
 Part 1 of this investigation of Layered Calendar Management in Microsoft Project explored the strategy and provided an overview of the features in MS Project that make the approach possible. This article covers how to put the strategy of Layered Calendar Management into practice. It provides step by step instructions on how the project manager can execute the methodology on their Microsoft Project schedules.
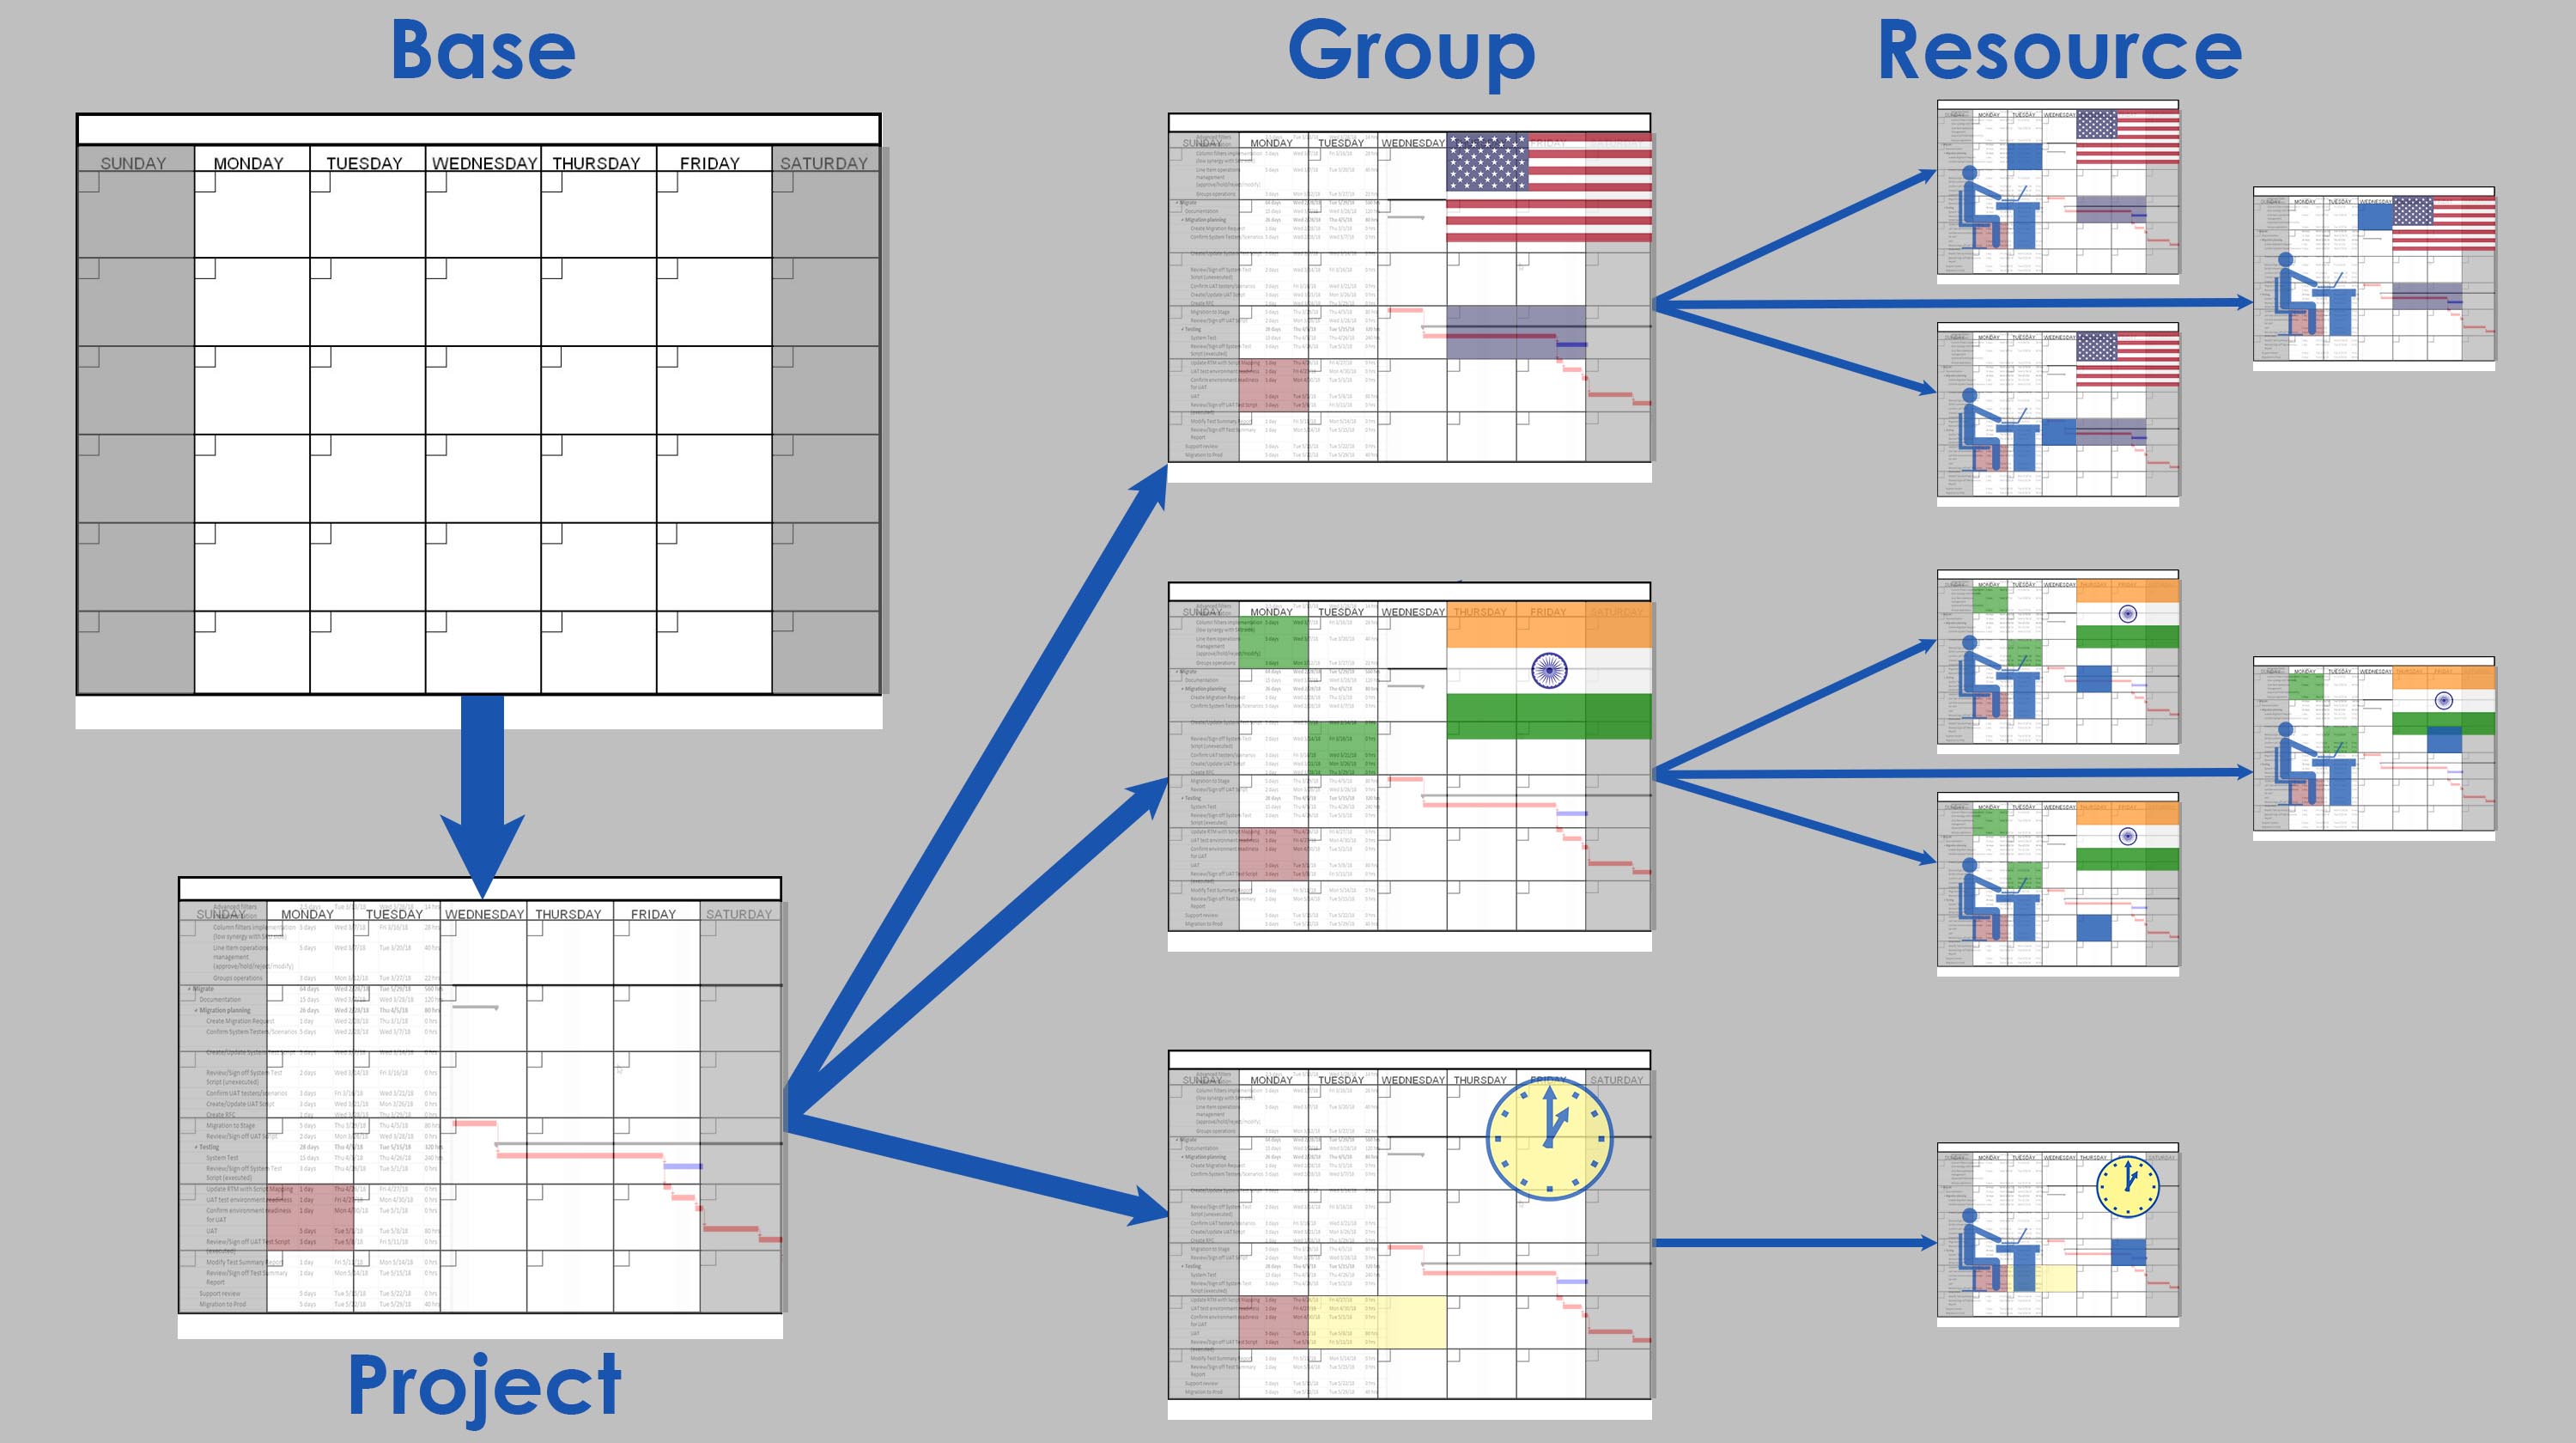
Creating the Project Calendar
Once the Project Manager has determined the most common hours and exceptions for a project they need to create a calendar that sets them as the default for the schedule. To perform this action, take the following steps:
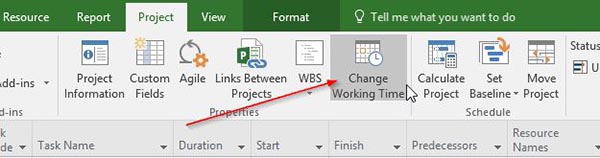
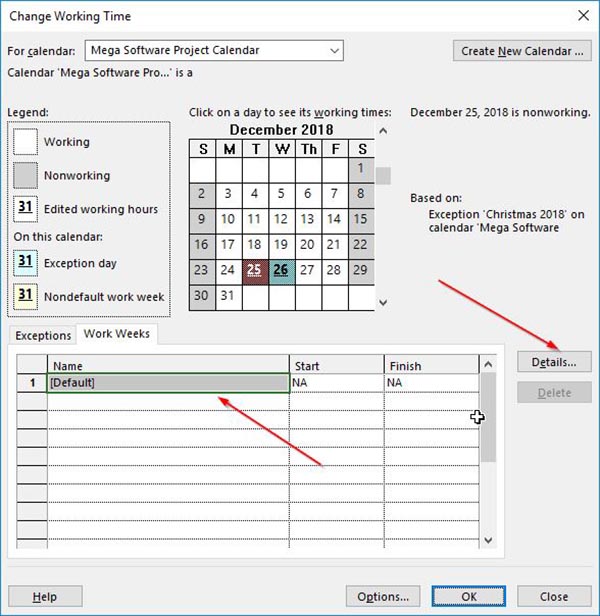
- From the Properties group of the Project ribbon, click on the the Change Working Time icon. Project opens the Change Working Time dialog.
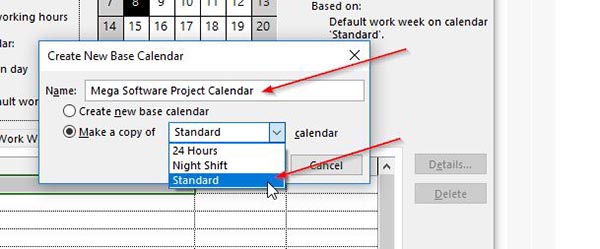
- Click the Create New Calendar button. Project opens the Create New Base Calendar dialog.
- Give the new calendar a descriptive name and select the base calendar from the Make a Copy of drop down that most closely matches the work time for most, if not all, of the project resources.
- Click on the OK button. Project creates a new calendar based on the base calendar selected in the Make a Copy of drop down.
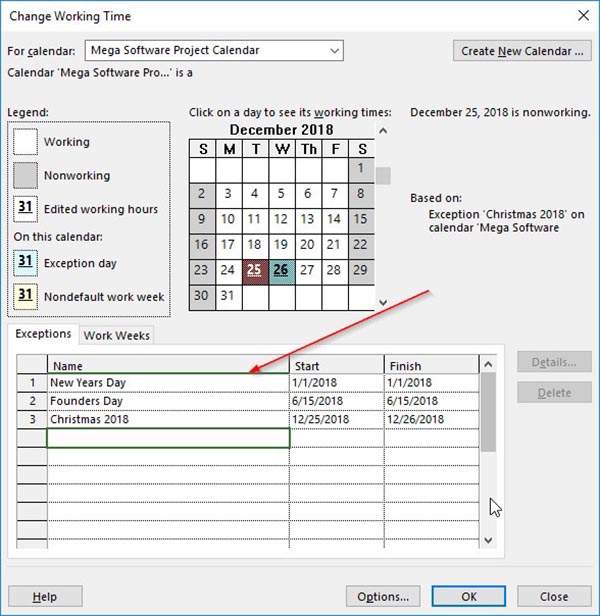
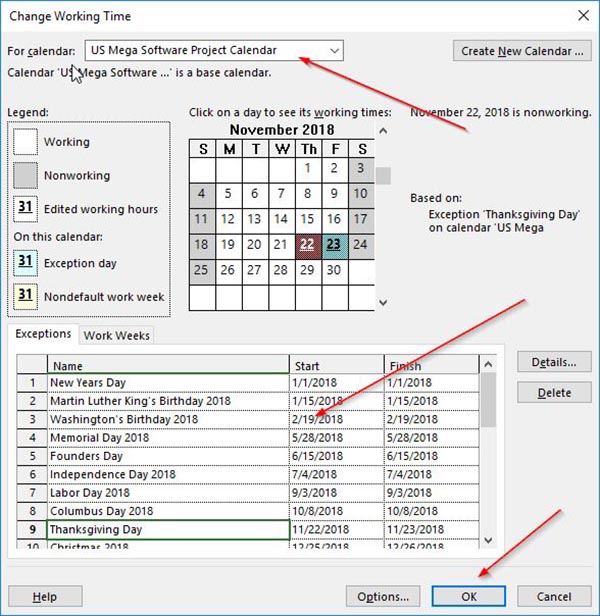
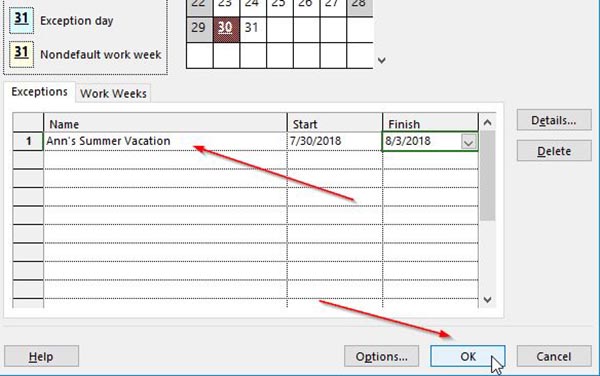
- Enter the exceptions to the project calendar into the Exceptions tab.
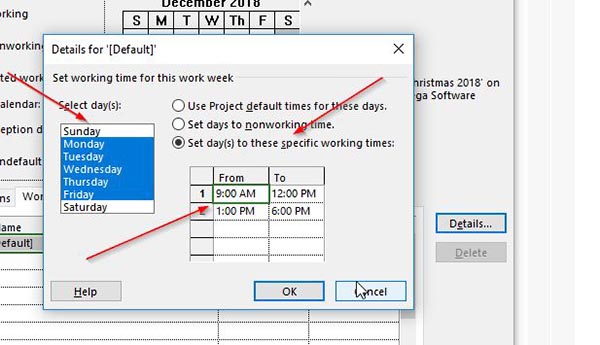
- If working time needs to be adjusted, click on the Work Weeks tab. If the default working time needs to be adjusted, click on the default entry and then click on the Details button. Project opens the Details for [Default] dialog.
- Select the days to adjust from the Select Days list box, click the Set day(s) to these specific working times:. Make other adjustments as needed.
- When finished, click the OK button. Project makes the indicated changes.
- Make any other required changes in the Change Working Time dialog. When finished, click the OK button to save the changes to the calendar.
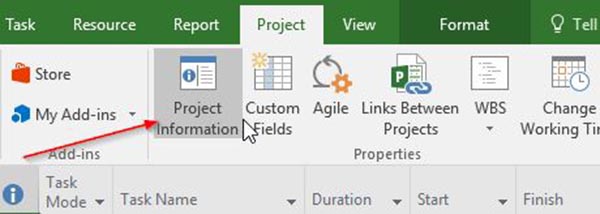
- Next, from the Properties group of the Project ribbon, click on the Project Information icon. Project opens the Project Information dialog.
- Select the calendar created above from the Calendar drop down menu. This will make the calendar created above as the default calendar for the project.
Creating Group Calendars
Once the project calendar has been created and set, the next step is to create group calendars. These will be created by using the project calendar as a template and then making adjustments as needed. To perform this action, take the following steps:
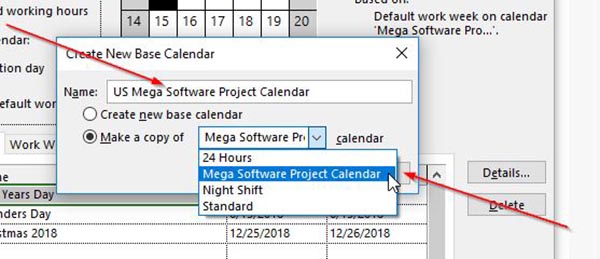
- From the Properties group of the Project ribbon, click on the Change Working Time icon. Project opens the Change Working Time dialog.
- Click the Create New Calendar button. Project opens the Create New Base Calendar dialog.
- Give the project calendar a descriptive name and select the project calendar created above from the Make a Copy of drop down menu. Click the OK button to create the calendar.
- Project creates the calendar using the project calendar as the base calendar. The Exceptions and Work Weeks are copied to the new project.
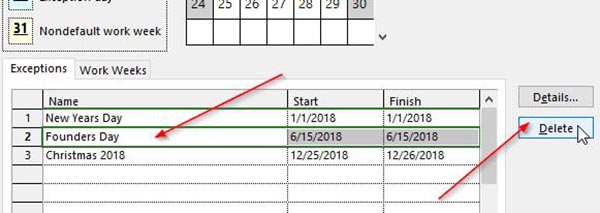
- To change an exception copied from the project calendar to a working day select the exception and click the Delete button. Project removes the exception. The working day designation will be applied for any resource assigned to this group calendar.
- Add new exceptions to the group calendar for the group or resources the calendar will be used for. Click on the OK button to save changes.
- Repeat the above for each group calendar required.
Managing Individual Resource Calendars
Once group calendars are created they can be used to manage default work hours and exceptions for resources. Each resource has an individual resource calendar that allows the project manager to set specific exceptions and work hours for that named individual resource. The actual work time and exceptions for a resource are determined as a union of the assigned group and individual resource calendars with the individual resource calendar taking precedence. To set up resources and their calendars, take the following steps:
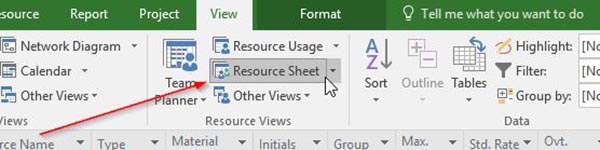
- Open the Resource Sheet by clicking on the Resource Sheet icon in the Resource Views group on the View ribbon or by typing “Alt + V then S”. Project opens the Resource Sheet.
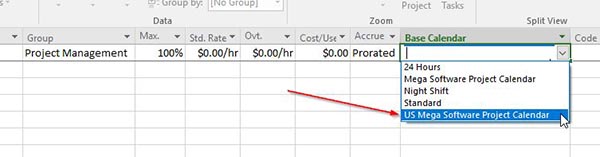
- Create the resource by entering the appropriate information on a line. Typically, this information would be found on the Stakeholder Register (even agile projects should have a Stakeholder Register). Select the group calendar that most closely matches the work time of the resource by selecting it from the drop-down menu in the Base Calendar column.
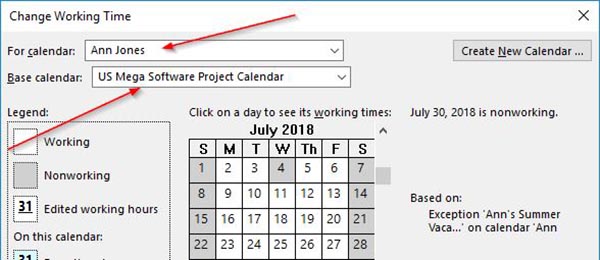
- To edit the individual calendar for the selected resource, click on the Change Working Time icon from the Properties group of the Project ribbon. Project opens the Change Working Time dialog. Note that the selected resource is set in the For calendar drop-down menu and the Base calendar drop-down menu is set to the resource selected in the Resource Sheet.
- Modify working time or create exceptions for the selected resource as needed. See above for information on how to perform some of the more common tasks. Click the OK to save the changes. Project updates sets the individual resource calendar for the selected resource as indicated.
Summary
The technique outlined above allows a project manager to administer the project resource’s working time and calendars at fours levels of increasing detail. The approach provides a minimum of individual clerical work while allowing a maximum of control over the calendars of all resources assigned to a project schedule. Diligent management of resource’s working time will allow Project to correctly calculate the start and end dates of activities on the schedule. Project will take into account when resources assigned to activities are available and determine accurate durations required to complete the work associated with tasks.
As mentioned previously, the management of resource working time should begin early on the project, ideally as a part of the “Identify Stakeholders” process. Calendars will be adjusted and refined throughout the life of the project requiring the project manager to make repeated trips to the Change Working Time dialog. When working times are adjusted, Project will re-calculate all the activities impacted by the change. Using the layered project calendar management strategy will make this critical process as efficient and accurate as possible.

References

Leave a Reply